_edited.jpg)
🧊 Beginner’s Guide to Ice Water Extraction (Step-by-Step for First Timers)
- BUBBLEBAGDUDE

- Jan 8
- 3 min read

If you’re brand new to bubble hash, ice water extraction might sound intimidating — but it doesn’t have to be.
The truth is, ice water extraction is one of the cleanest, safest, and most beginner-friendly ways to make solventless hash at home. With the right setup and a little patience, you can get golden, terpene-rich bubble hash on your very first run.
This guide walks you through the entire process step by step, with beginner tips to help you avoid common mistakes.
🧪 What Is Ice Water Extraction?
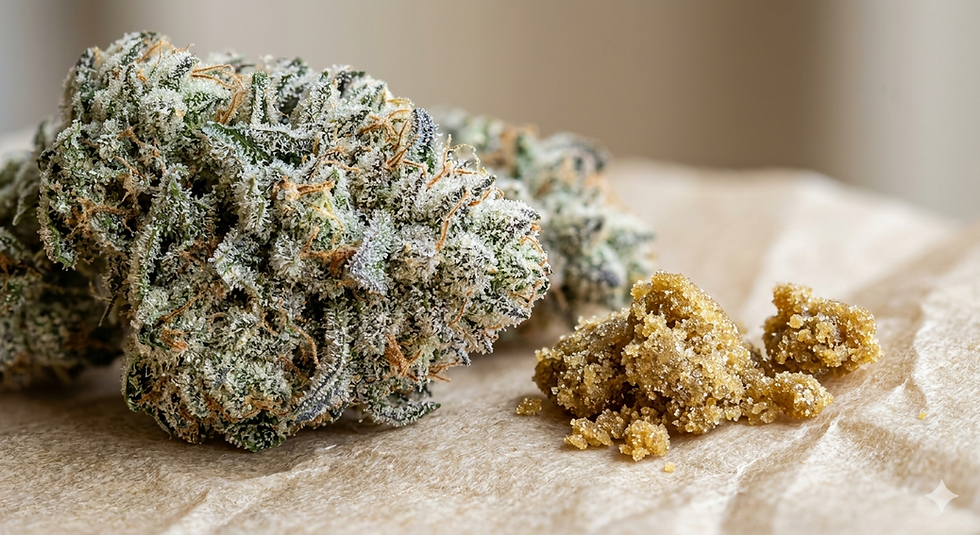
Ice water extraction is the process of separating trichomes from plant material using cold water, ice, and filtration screens (bubble bags).
Cold temperatures make trichomes brittle, allowing them to snap off cleanly when gently agitated.The trichomes sink and get collected through micron-rated filter bags.
No chemicals. No solvents. Just ice, water, and gravity.
❄️ Why Ice Water Extraction Is Perfect for Beginners
Ice water extraction is ideal if you’re just starting because:
No solvents or chemicals
Easy to control quality
Affordable setup
Scales from small to large batches
Produces clean, flavorful hash
With tools like the 👉 BubbleBagDude 5-Gallon Bubble Machine and👉 BubbleBagDude 5-Gallon Extraction Bags, the process becomes simple and repeatable.
🧰 What You’ll Need (Beginner Setup)
Here’s a basic ice water extraction kit:
Ice (lots of it)
Cold water
Plant material (fresh frozen or quality trim)
5-Gallon Bubble Machine or stirring paddle
Buckets
Spoon or scraper
Drying screen or parchment paper
💡 Pro tip: Keeping everything cold is key. Many beginners improve results instantly by adding the 👉 Thermal Wrap Insulation Jacket to keep water at near-freezing temperatures.
🌡️ Step 1: Chill Everything First
Before you start:
Chill your water
Chill your buckets
Chill your plant material
Target water temperature: 32–34°F (0–1°C)
This is the single biggest factor in clean extraction.
🪣 Step 2: Load the Machine or Bucket
Add plant material (about ⅓ of the bucket)
Add ice until material is fully covered
Fill with cold water
Let it sit for a few minutes so everything cools evenly.
🌀 Step 3: Gentle Agitation
Turn on your bubble machine or gently stir by hand.
Beginner rule:👉 Mix gently for 12–15 minutes
Too much agitation breaks plant matter and contaminates hash.
Consistent, gentle movement gives better results — which is why many beginners prefer the👉 BubbleBagDude Bubble Machine.
🧼 Step 4: Drain Through the Bubble Bags
Stack your bags in this order (top to bottom):
220µ (work bag)
190µ
160µ
120µ
90µ
73µ
45µ
25µ
Lift each bag slowly and let it drain completely before moving to the next.
Each bag captures a different grade of hash.
🧂 Step 5: Collect the Hash
Use a spoon or scraper to collect the hash from each micron screen.
Place it on parchment paper or a drying screen.Label each micron so you don’t mix grades.
🌬️ Step 6: Dry the Hash Properly
Spread hash thin and let it air-dry for 24–48 hours in a cool, dark place.
Never use heat.Never seal while wet.
Proper drying preserves melt, flavor, and prevents mold.
🔁 Should You Do Multiple Washes?
Yes — beginners often get better yield by doing 2–3 short washes.
Just refresh ice and cold water between washes.
🧠 Beginner Mistakes to Avoid
Using warm water
Over-mixing
Overfilling the bucket
Rushing the draining step
Storing hash before it’s fully dry
Fix these, and your results improve fast.
🧩 Final Thoughts
Ice water extraction isn’t about speed — it’s about control.
When you:
Keep everything cold
Use gentle agitation
Filter properly
Dry patiently
You’ll get clean, flavorful bubble hash — even on your first attempt.
👉 Ready to build your beginner setup? Explore the full BubbleBagDude Extraction Collection.
❓ Quick FAQ
Is ice water extraction safe for beginners?
Yes — it uses no solvents and is very forgiving.
What temperature should I aim for?
32–34°F (0–1°C).
Can I do this without a machine?
Yes, but machines offer more consistent results.
How long does the full process take?
About 2–3 hours including drying prep.


Comments